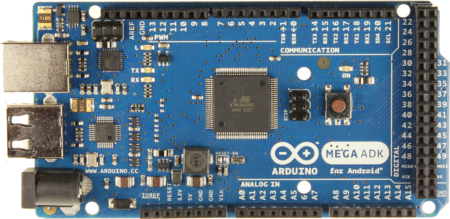
To setup the environment for Arduino Mega ADK it is quite simple.
- Download & install the latest Arduino software installation from here. I have installed Arduino V1.6.5 here is the link to the installer.
- Download & unzip USB_Host zip file from here. And here is the link to the direct zip file.
- Once the above zip file is extracted, rename the folder(in my case the folder was "USB_Host_Shield_2.0-master" ) to "USB_Host_Shield_20" without the quotes.
- Now copy "USB_Host_Shield_20" folder to Arduino Libraries folder. In my case the folder is located at "C:\Program Files (x86)\Arduino\libraries". After this step the libraries folder should look something similar to the below screenshot
Now open the Arduino program. Click on File -> Examples -> USB Host Shield Library 2.0 -> adk -> ArduinoBlinkLED.
Now the blink LED code is available, compile the code and see if everything goes well. That's it, the LED blink from Arduino side is ready. Below is the code with some modifications.
[Optional]
I connected a LED to the Arduino board as in the link here. And changed the "#define LED 9" to "#define LED 13".
From the above code, note that the part where it says "ADK adk(&Usb, "Srichakram",.........." should match the code in the "accessory_filter.xml" from android app. i.e., The Manufacturer, Model and Version from the code above should match the manufacture, model, version in the "accessory_filter.xml" in the android application.
Next comes the tricky part, either you may get the app to run with android from here, or follow up with my next blog post(below link) to write your own application using Android Studio.
Next Steps:
Setting up Android Studio to work with Mega ADK & Simple LED Blink codeContinue with Arduino Mega ADK and Android Application communication through the end
References:


Post a Comment